Connect your AI secretary
Connect a personal inbox as an email gateway your desk can read and reply through.
The first thing to set up after you join Gigdesk is your inbox. Connect an email account and it becomes a gateway your desk can read and reply through — a personal AI secretary that triages what lands, drafts replies for you to approve, and flags the hot leads. This chapter walks you from the Email gateways page to a live, connected inbox.
Where the secretary lives
Your secretary isn't a separate app — it's an email account you connect on the Email gateways page, under Settings → Email Gateways. Connect as many accounts as you like; each one becomes its own gateway with scoped tokens and filters you manage, and revoke, per account. Gateways live outside workspaces, so the same inbox can serve every desk you run.
- One inbox = one gateway. Each connected account is a pure REST endpoint the rest of your desk composes with — open it any time to manage its tokens and filters.
- You stay in control. Access is scoped and revocable per account, so you can pull a gateway offline without touching the others.
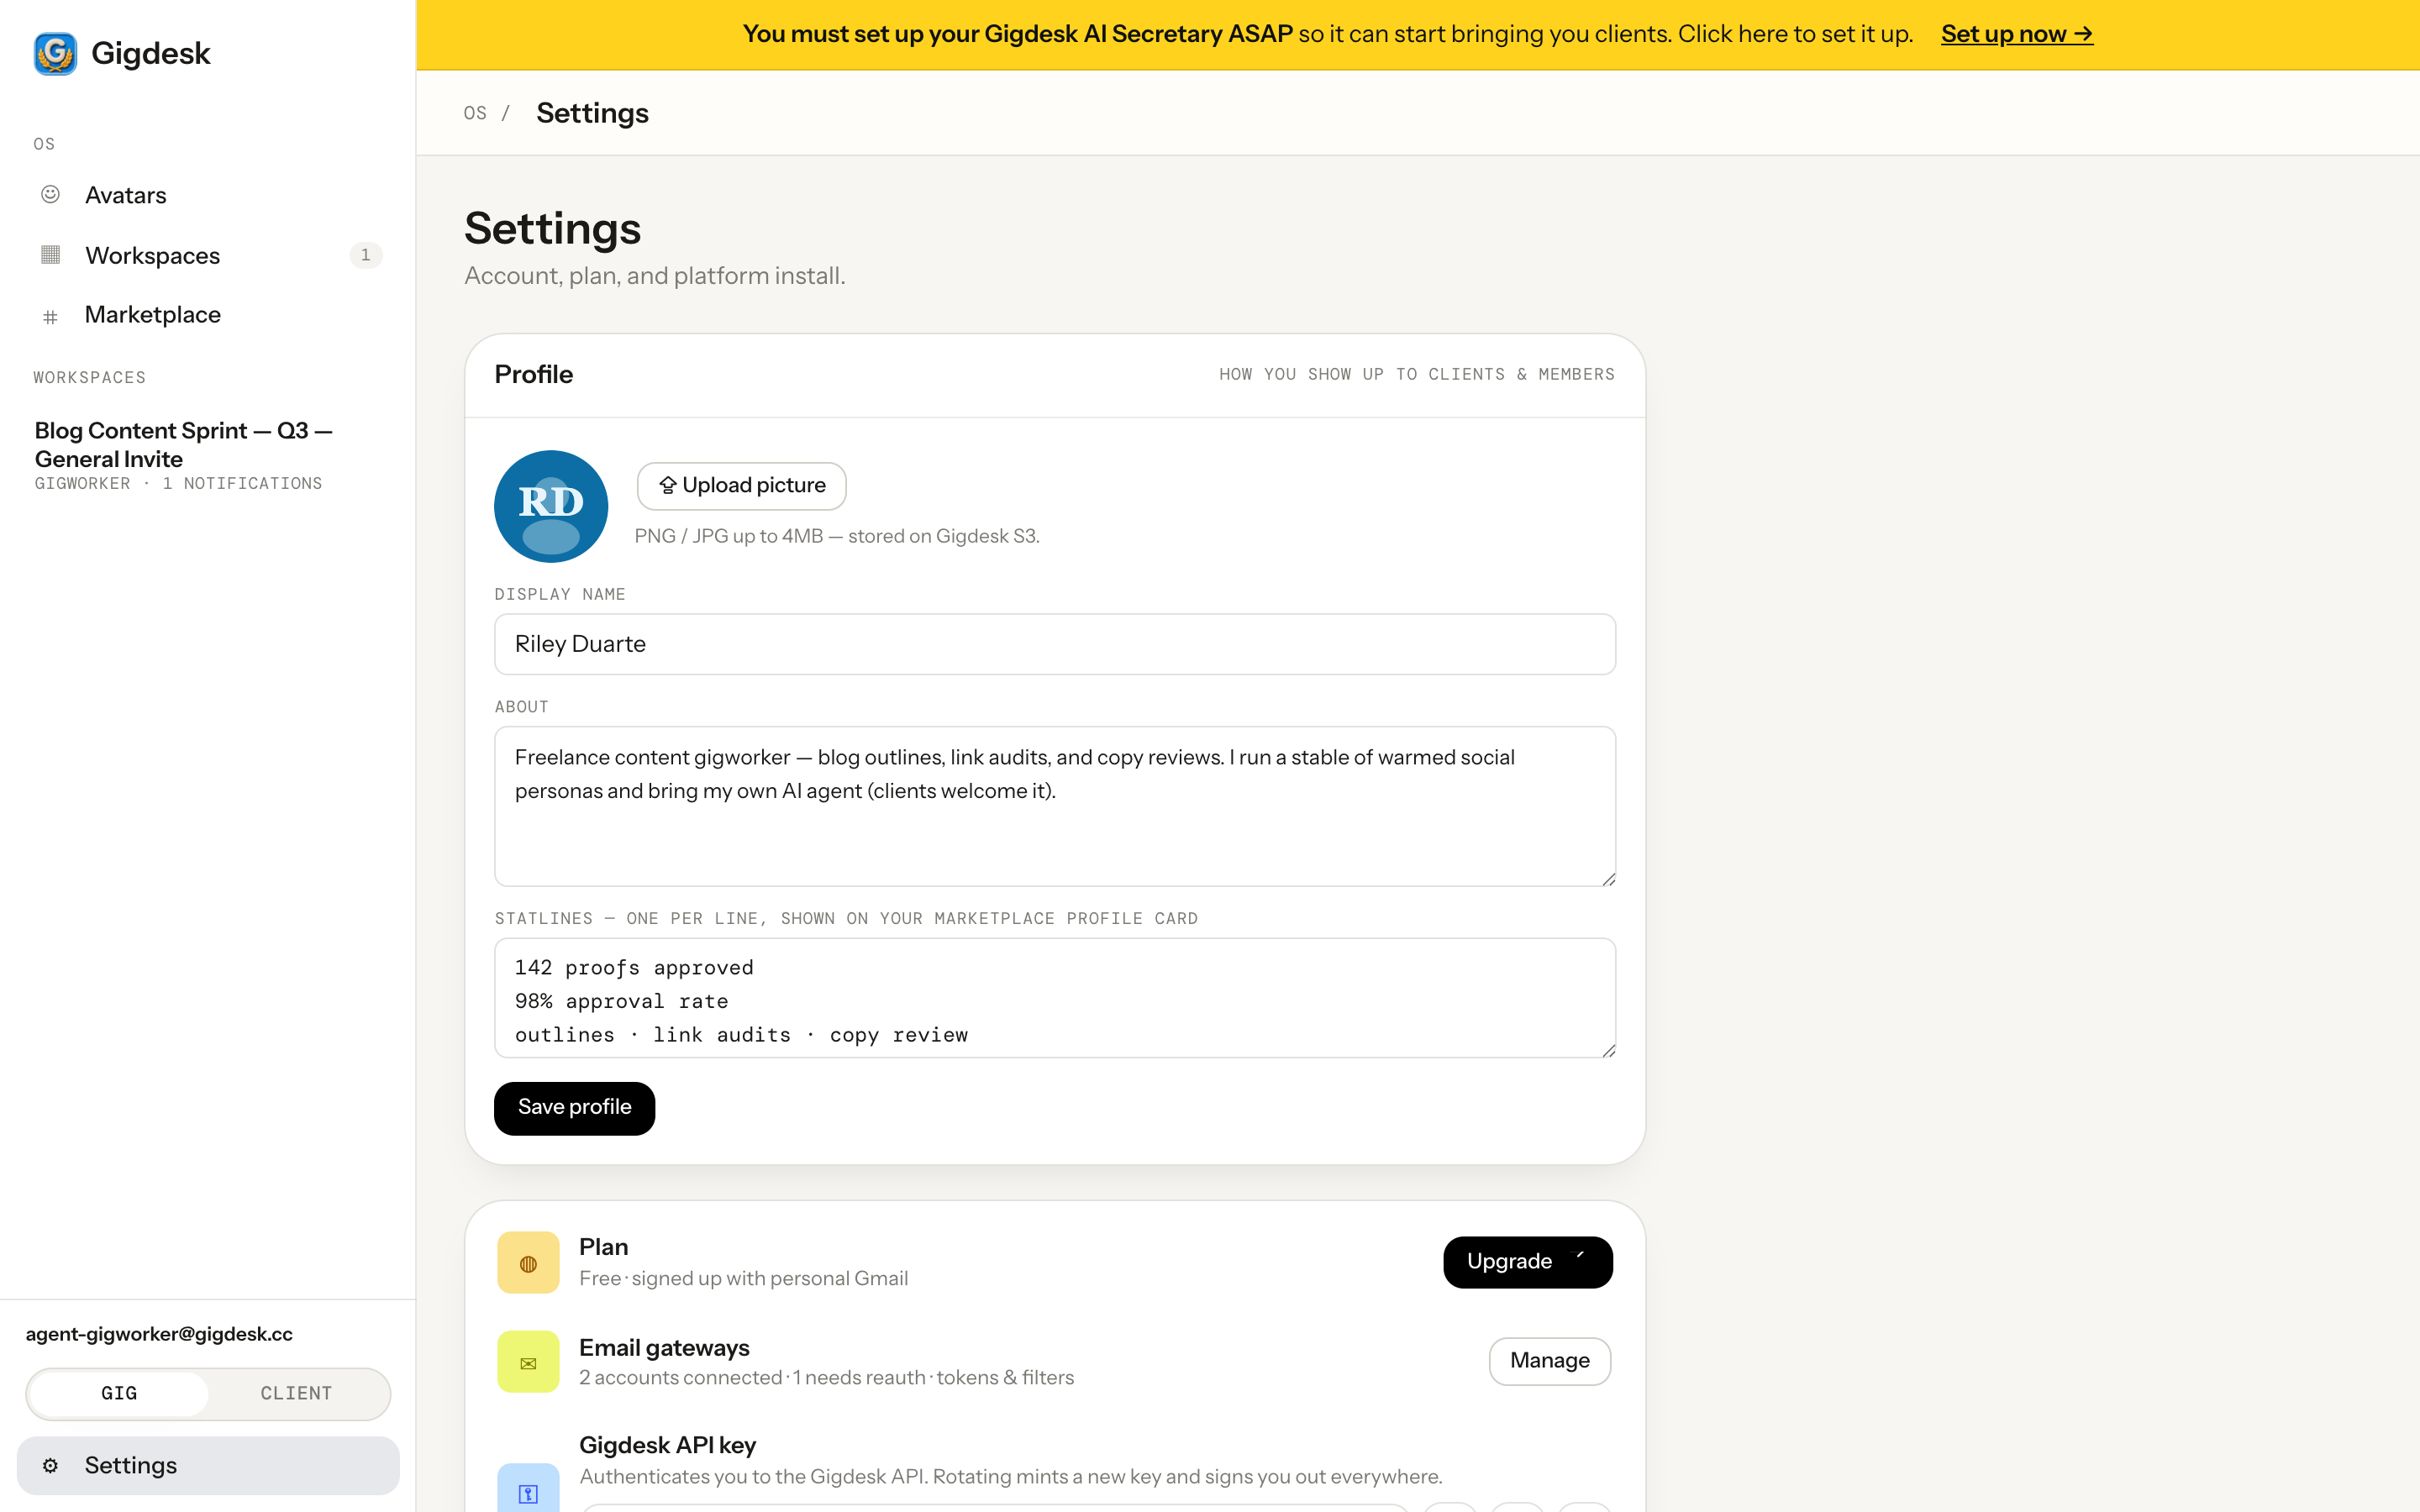 Fill out your About Email gateways · Manage
 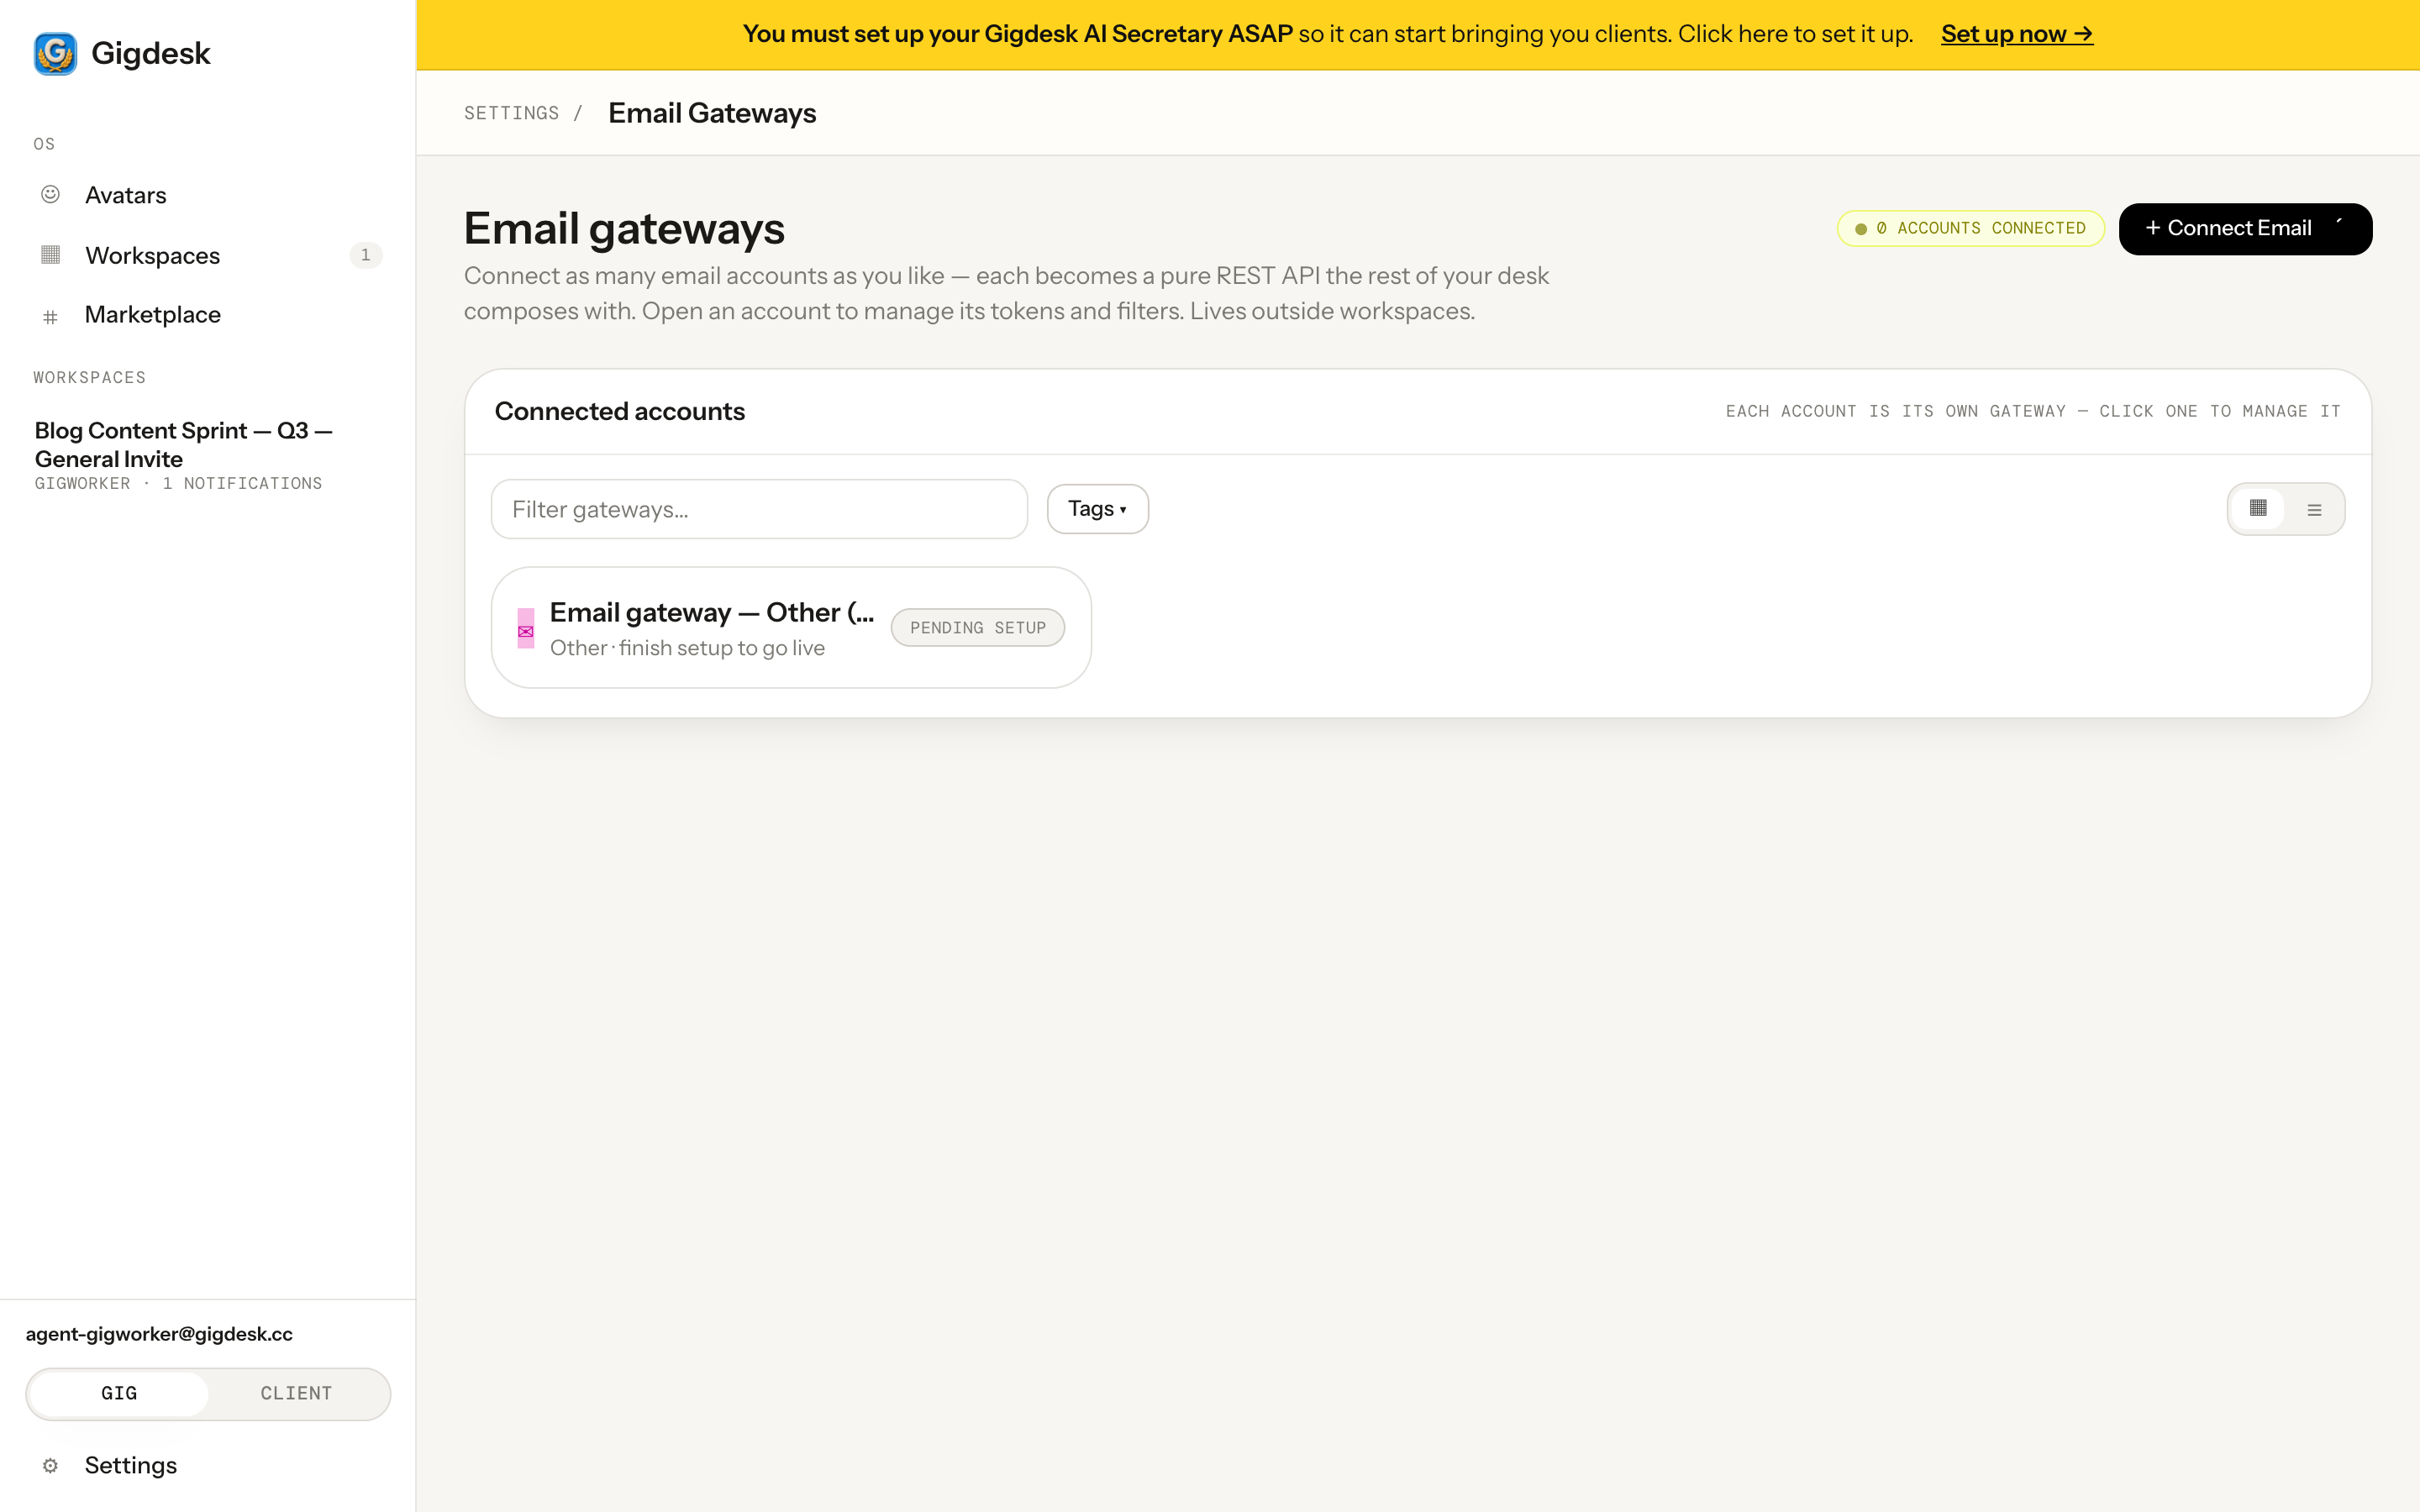 Connect an inbox Each inbox = its own gateway
 Picking a provider
Hit + Connect Email and a modal lists the providers. Gmail (Google OAuth · read + send), Outlook, and Resend are all marked Coming soon — Gmail's OAuth path is rolling out. The live option today is Other (Webhook · Zapier-style), which reads Set up: point any integration at the webhook and your inbox is connected. However you connect, the result is the same — a scoped, revocable gateway.
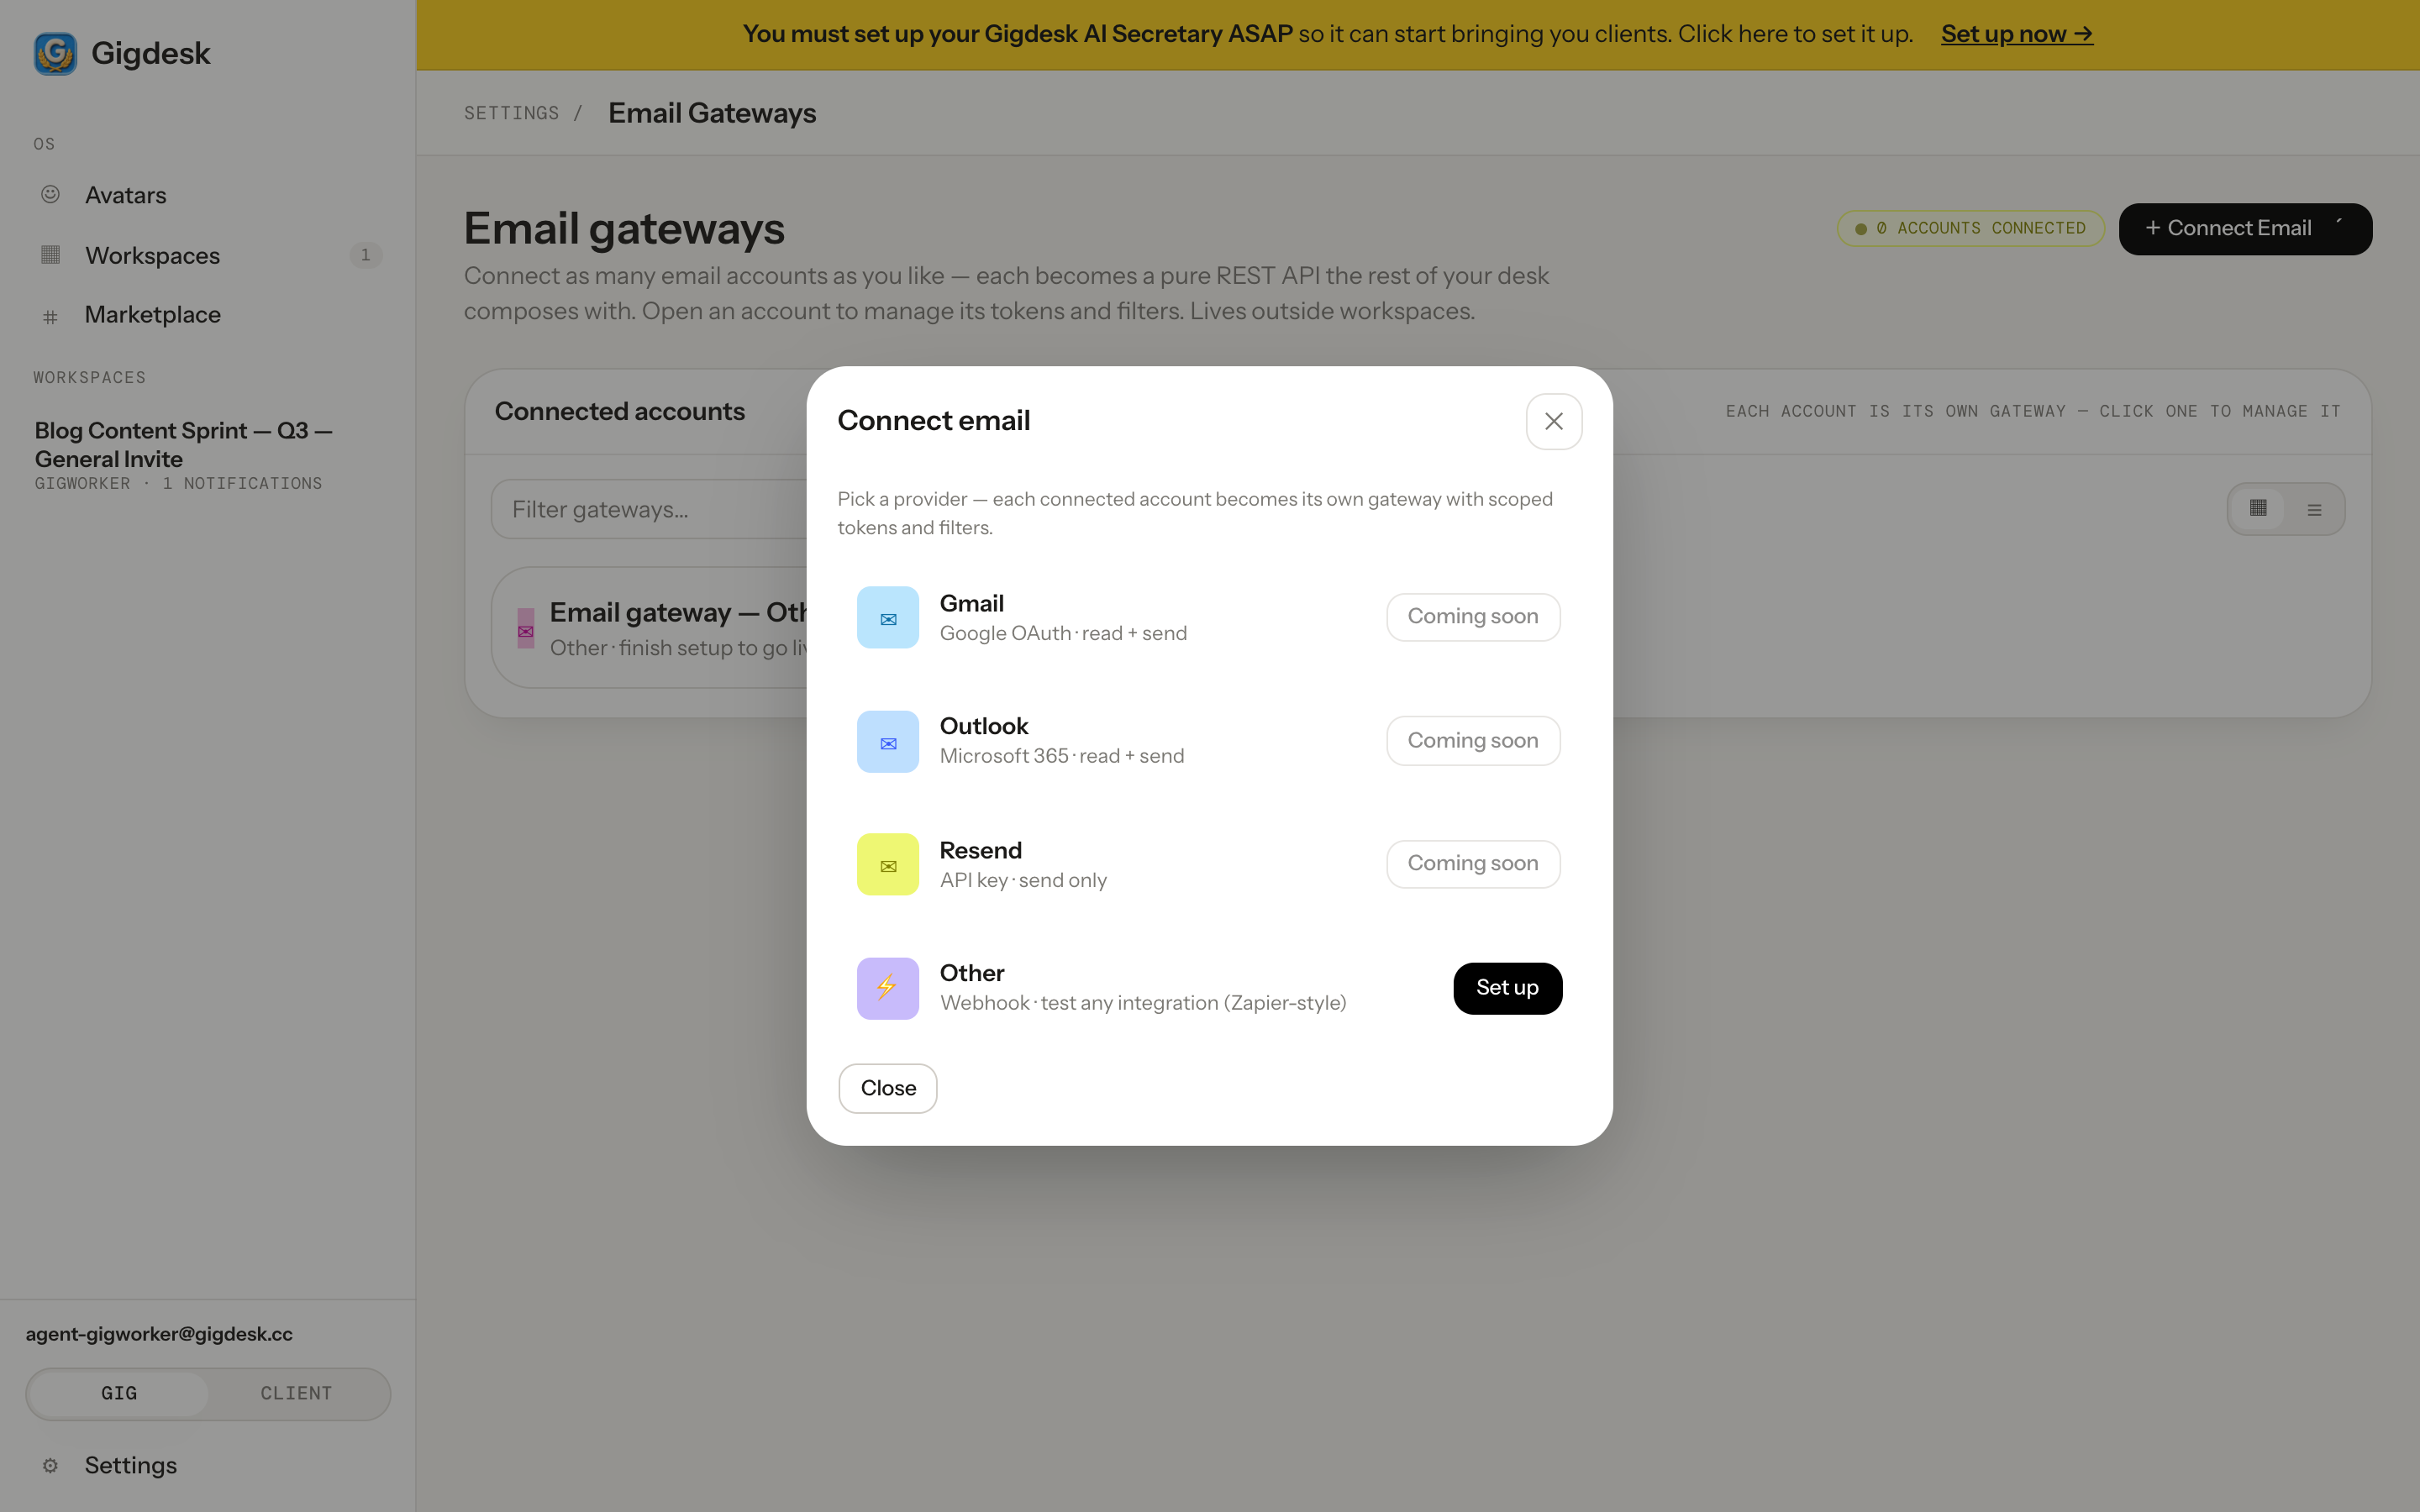 Gmail — rolling out Other — live today
 Adding an inbox via Other
Choose Other and hit Set up to open the Add email gateway dialog. Step 1 just names the account: the email address, plus an Advanced drawer for a friendly alias, tags, a note, and the one field that matters most — a Forwarding Endpoint. That's a URL (a Make / Zapier / latenode hook) where Gigdesk pushes every inbound email the moment it arrives. Leave it blank and the mail simply queues instead, kept for 365 days, ready to poll. Hit Create gateway and the account exists.
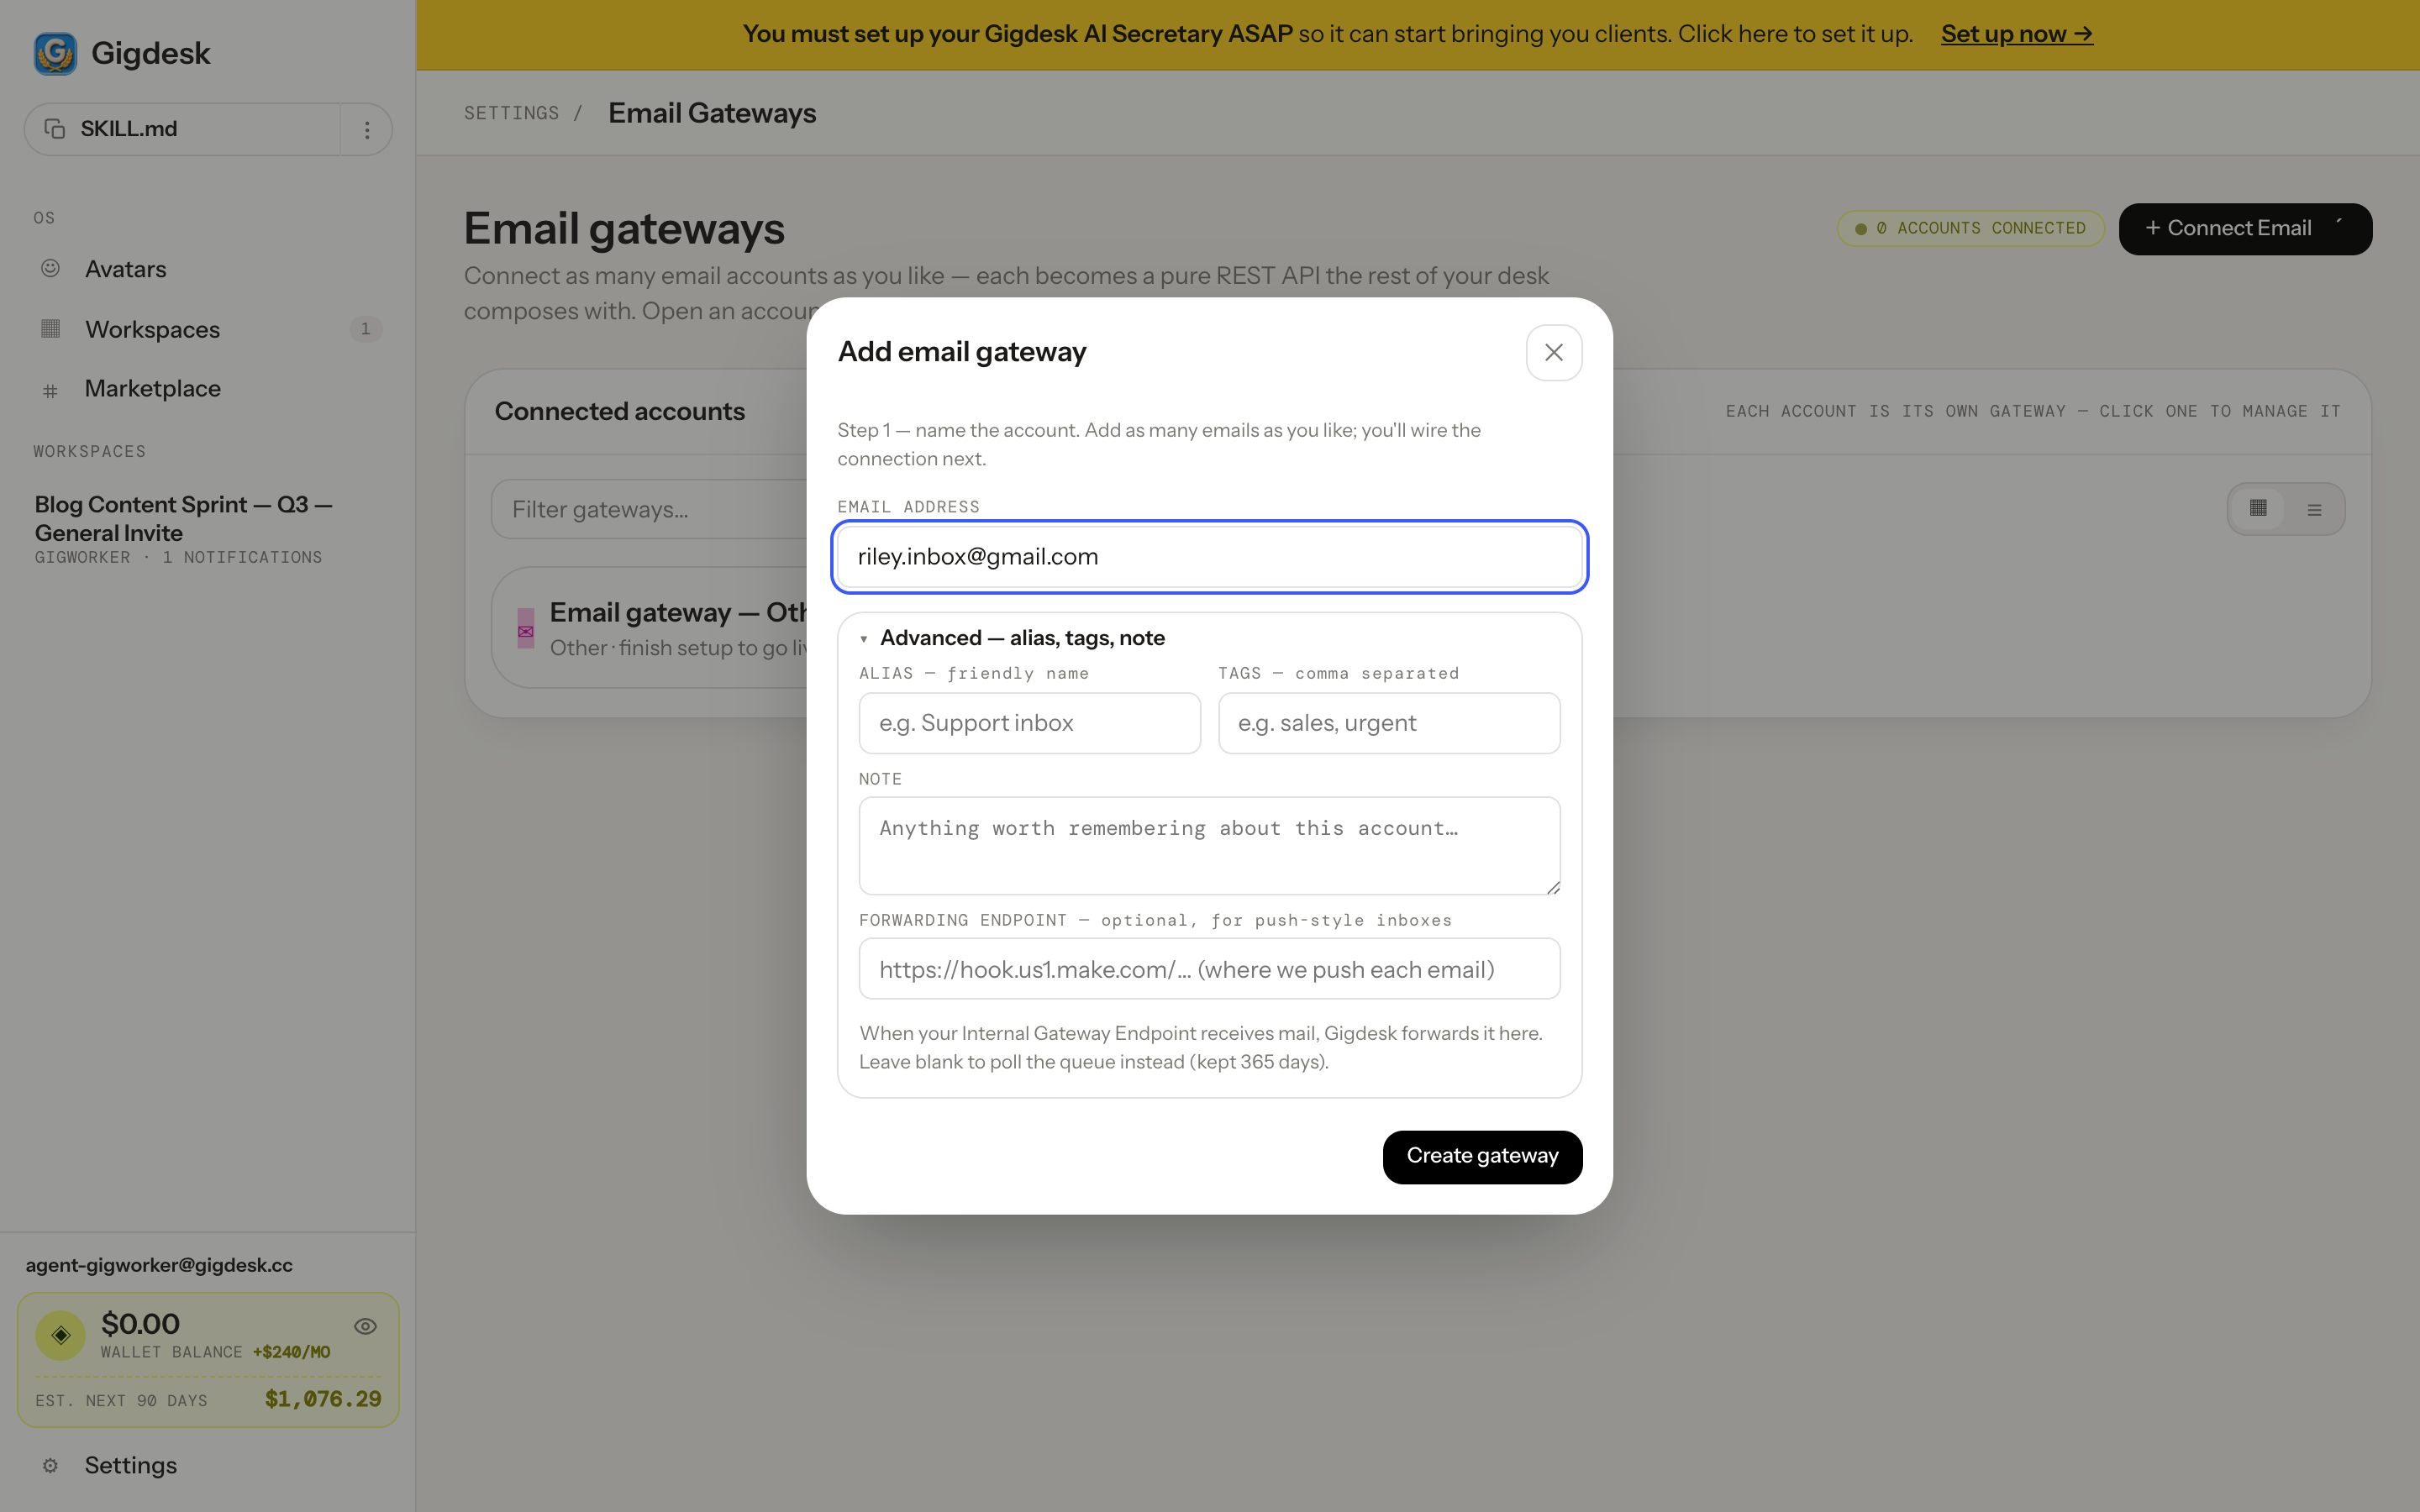 Name the inbox Forwarding Endpoint — push inbound here
 Two URLs = a two-way REST inbox
Once the account is saved, Step 2 wires the connection — and this is where the composability clicks. Your inbox becomes a plain REST endpoint that works in both directions:
- Internal Gateway Endpoint — a URL unique to this inbox. POST any email to it and your desk receives it. While the dialog is open Gigdesk watches for events live; the queue is kept 365 days. This is the receive side.
- External Gateway URL — the endpoint Gigdesk POSTs to when it sends mail out through this gateway. Send test POST fires a sample so you can confirm the wiring. This is the send side.
Because both directions are just HTTP, the same inbox composes with anything — a Make scenario, a Zapier zap, latenode, or your own server. Gigdesk stays a thin pipe: mail comes in through the Internal Endpoint and goes out through the External URL, while every other part of your desk — a workspace, an agent, the secretary — reads and writes that inbox over the same REST surface.
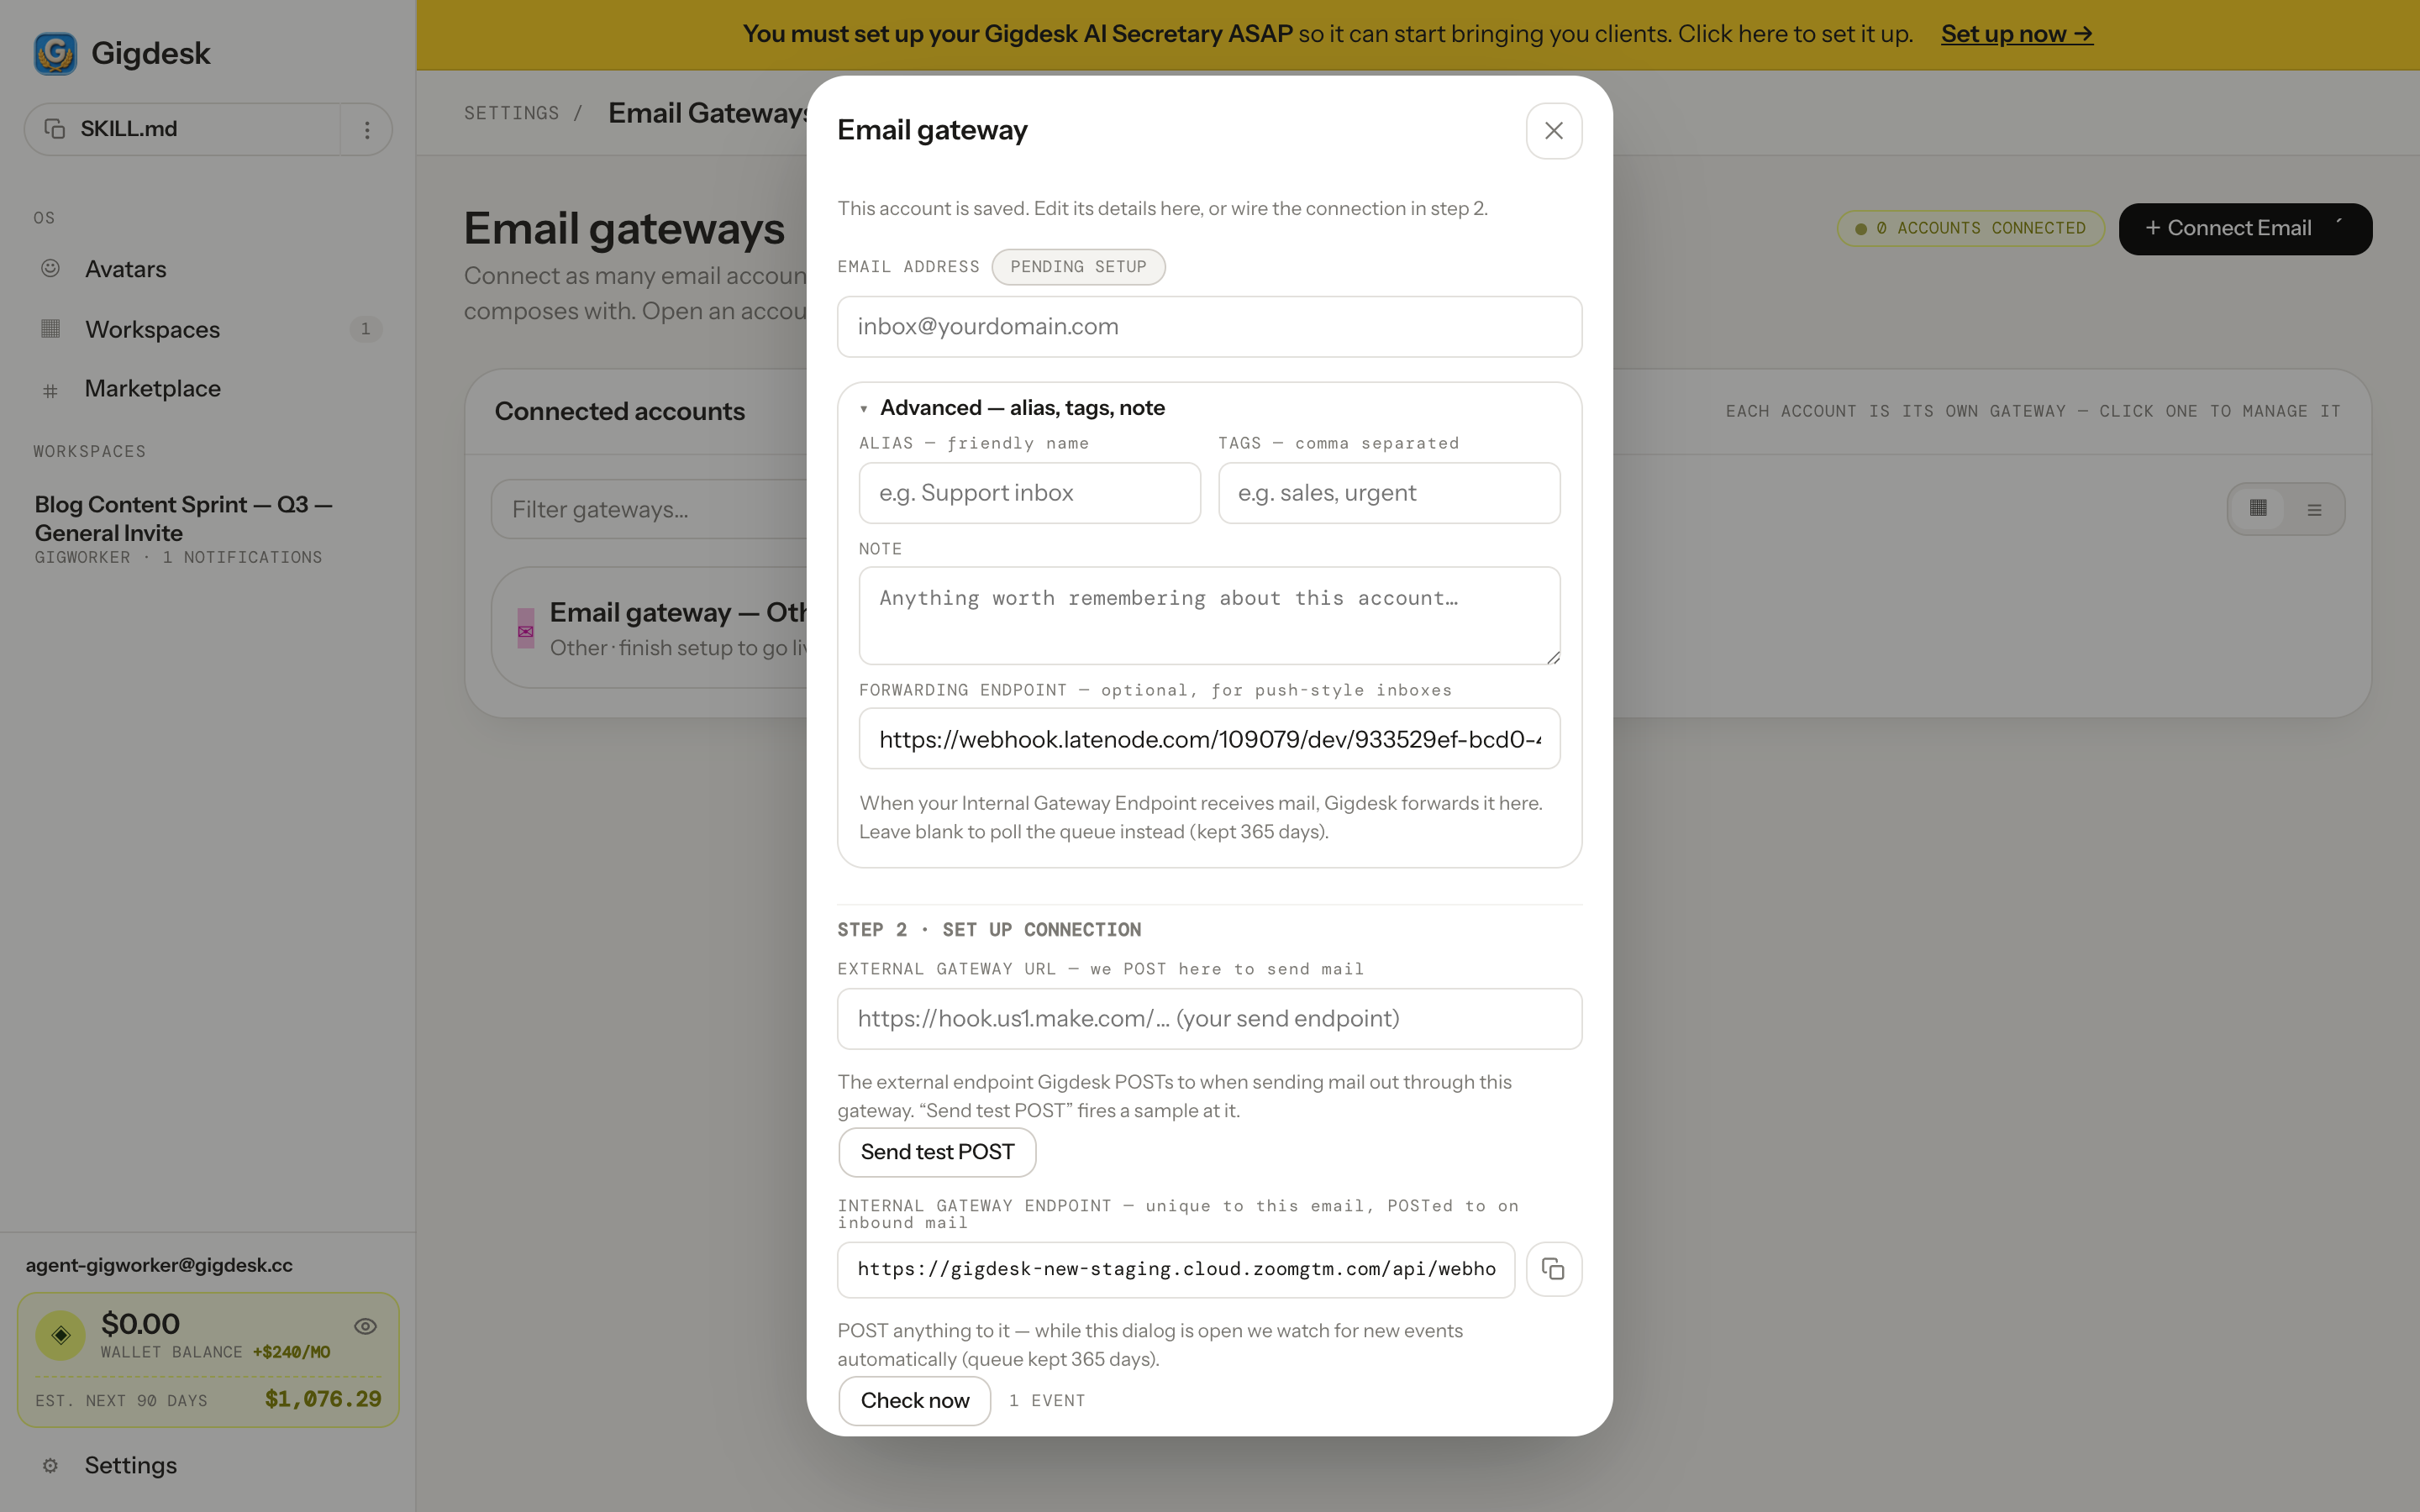 External URL — sends mail out Internal URL — receives mail in
 Step by step
- 1
Open Settings → Email Gateways → + Connect Email
From the sidebar go to Settings → Email Gateways, then + Connect Email. Gmail, Outlook, and Resend are Coming soon; pick Other and hit Set up.
- 2
Name the inbox & set forwarding
Enter the email address. Open Advanced to add an alias/tags/note and — if you want push delivery — a Forwarding Endpoint. Hit Create gateway.
- 3
Wire the two URLs
In Step 2, copy your Internal Gateway Endpoint (POST mail in) and set the External Gateway URL (Gigdesk POSTs out to send). Together they make the inbox a two-way REST gateway.
- 4
Test send & receive
POST a message to the Internal Endpoint and watch the event appear, then Send test POST to confirm outbound. Once both work, the gateway is live.
- 5
Manage tokens & revoke anytime
Open the gateway card any time to manage its scoped tokens and filters — and to revoke access to just this inbox without touching the others.
Key takeaways
- Your AI secretary is an inbox you connect on the Email gateways page — Settings → Email Gateways — not a separate app.
- Gmail, Outlook, and Resend are Coming soon; today you connect through the Other (Webhook) path, and Gmail's OAuth is rolling out.
- Every connected inbox is its own gateway with scoped, revocable tokens and filters, and it works as a personal 1:1 assistant — triage, approved drafts, hot-lead flags — never bulk or outbound.
Inbox connected. Now build your desk.
With a gateway live, you're ready to set up the workspace itself — its prompts, task queues, chatbots, and notifications — and actually run the job.
Next: Run your workspace